Organize Outdoor Treasure Hunt for Team Building Success

Table of Contents

Quick Summary

Key Point Explanation
1. Define clear objectives Establish specific goals for the treasure hunt to guide planning and team engagement effectively.
2. Choose strategic locations Select diverse, safe environments that align with team strengths for optimal challenge experiences.
3. Design inclusive challenges Create a mix of puzzles that require teamwork, ensuring all participants have opportunities to contribute.
4. Communicate rules effectively Provide a clear, engaging briefing on rules and expectations to ensure participants understand their roles.
5. Gather feedback post-event Implement comprehensive feedback mechanisms to evaluate team dynamics and improve future events.

Step 1: Define objectives and select locations

Successful team building treasure hunts start with crystal clear objectives and strategic location planning. Your first step involves mapping out exactly what you want your team to achieve and selecting environments that will maximize engagement and learning.
 

According to the ENERGY STAR Treasure Hunt Guide, effective team selection involves carefully dividing participants by function or physical workspace. This approach ensures comprehensive coverage and diverse perspectives. When choosing locations, consider spaces that offer variety interesting challenges but remain safe and accessible. Think about your team composition and select environments that will challenge but not overwhelm participants.
 

As you plan, think strategically about your team’s strengths. Some teams might excel in urban settings with complex navigation challenges while others might prefer more open outdoor spaces. Your location should match your underlying team building goals whether those involve problem solving communication or simply having fun together. Pro tip select multiple potential locations and have backup plans ready in case of unexpected issues like weather restrictions or facility access limitations.
 

Once you have defined clear objectives and selected promising locations your treasure hunt starts taking shape. The next crucial step will be designing specific challenges that align with your chosen environment and team dynamics.

Step 2: Design engaging treasure hunt challenges

Creating captivating treasure hunt challenges transforms an ordinary team building activity into an extraordinary experience. Your goal is to craft puzzles that are simultaneously challenging intriguing and fun for all participants.
 

According to Scavenger Hunt Co., a successful treasure hunt should include 8-12 clues for a one-hour event with each puzzle taking 3-5 minutes to solve. This means designing a mix of difficulty levels to keep everyone engaged. Start by developing challenges that require different skills teamwork and problem solving approaches. Some puzzles might involve decoding messages others could require physical challenges or solving riddles that need collective brainpower.
 

When designing your challenges think variety and inclusivity. Create tasks that allow different team members to shine technical wizards might excel at digital clues while creative thinkers could dominate visual or storytelling challenges. Ensure that no single team member can solve everything solo the key is forcing collaborative problem solving. Consider incorporating elements like GPS coordinates photography tasks trivia questions or physical landmarks as part of your challenge design.
 

Understanding what makes a treasure hunt event truly engaging can help you refine your approach. Pro tip always test your challenges beforehand to confirm they are solvable fun and align with your team building objectives. Once your challenges are designed youre ready to move on to the next crucial step coordinating the logistics and equipment needed for your treasure hunt adventure.


Step 3: Set up technology and game logistics

Technology and logistics form the backbone of a successful treasure hunt experience. Your mission is to select and configure the right tools that will seamlessly support your team building adventure and create a smooth engaging gameplay environment.
 

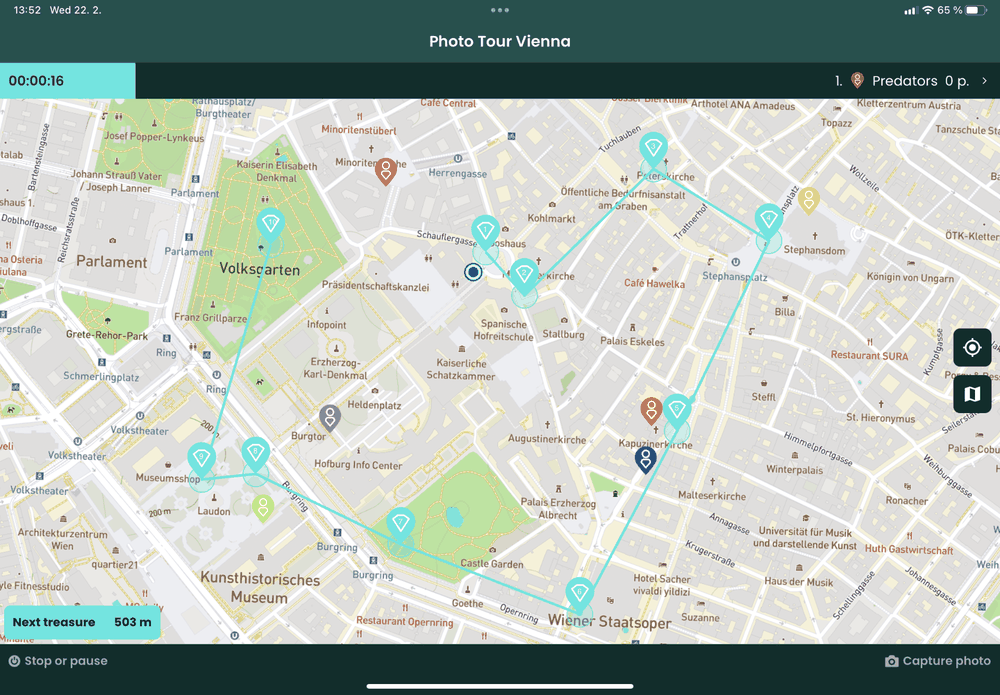
Modern treasure hunts leverage innovative technological solutions. According to ClueKeeper, GPS location aware software platforms now allow creators to develop immersive puzzle hunts using smartphones. These platforms integrate features from puzzle hunts escape rooms and augmented reality to enhance participant experience. When setting up your technology start by selecting a robust mobile platform that supports real time tracking team communication and challenge verification. Ensure all participants can easily download and access the required app or software before the event begins.
 

Research from arxiv exploring virtual reality navigation systems suggests that collaborative technological tools can significantly improve team engagement. Consider incorporating digital elements that encourage interaction such as photo verification checkpoints QR code scanning or location based challenges. Installing the mobile app correctly will be crucial to your event success. Pro tip always have backup analog systems like printed maps or physical clue sheets in case of technological failures. Test all equipment thoroughly before the actual event to minimize potential disruptions.
 

With your technology and logistics carefully planned youre now ready to brief your team and prepare for an unforgettable treasure hunt experience.

Step 4: Coordinate teams and communicate rules

Successful treasure hunts require meticulous team coordination and crystal clear communication. Your goal is to create a structured yet exciting environment where every participant understands expectations and feels motivated to contribute.
 

According to Southwestern University, effective treasure hunt organization depends on comprehensive rule communication covering critical aspects like team composition arrival times and travel methods. When forming teams aim for balanced groups that mix different skill sets and personalities. Consider factors like professional backgrounds communication styles and problem solving approaches to create dynamic teams that complement each other. Clearly outline team size requirements team formation guidelines and expectations for collaboration during the hunt.
 

Communicating rules requires more than just listing regulations. Create an engaging pre event briefing that explains not just what participants should do but why these rules matter. Cover essential details such as scoring mechanisms safety protocols photo documentation requirements and challenge completion standards. Launching an event smoothly depends on everyone understanding their roles and responsibilities. Pro tip develop a concise one page rule summary that participants can reference quickly during the treasure hunt. This document should be clear visually appealing and include key contact information for event coordinators.
 

With teams coordinated and rules communicated effectively youre now ready to transition into the most exciting phase creating an unforgettable team building experience.

Step 5: Monitor progress and ensure fair play

Fair play and real time monitoring are crucial for maintaining the integrity and excitement of your treasure hunt. Your role as an event coordinator involves creating a system that tracks team progress transparently while preventing any potential rule violations.
 

Southwestern University emphasizes the importance of establishing clear behavioral guidelines to ensure fair competition. Their approach recommends implementing specific team protocols such as requiring teams to stay together and document their journey through consistent photo evidence. Design a monitoring strategy that allows event coordinators to track team movements verify challenge completions and validate submissions in real time. Utilize technology like GPS tracking mobile check in systems and digital submission platforms to create an transparent and accountable environment.
 

Effective monitoring goes beyond simple rule enforcement it creates an atmosphere of trust and shared excitement. Assign dedicated coordinators to different zones or challenge areas who can provide immediate assistance answer questions and verify team submissions. FAQ and tutorials can help you establish standardized protocols for handling potential disputes or unexpected situations. Pro tip create a centralized communication channel where teams can report issues and coordinators can quickly respond. This approach not only ensures fair play but also enhances the overall participant experience by providing immediate support and maintaining the events momentum.
 

With progress monitored and fair play guaranteed youre now prepared to bring your treasure hunt to its exciting conclusion.

Step 6: Review outcomes and gather feedback

The final stage of your treasure hunt is more than just celebrating winners its an opportunity to extract valuable insights and improve future team building experiences. Your goal is to transform the event into a learning opportunity that provides meaningful data about team dynamics and participant engagement.
 

Research from arxiv on gamification highlights the critical importance of reviewing outcomes to understand behavioral changes and participant motivation. Design a comprehensive feedback mechanism that goes beyond simple satisfaction surveys. Create a structured approach that captures quantitative metrics like challenge completion rates team collaboration scores and individual participation levels alongside qualitative insights about personal experiences. According to Gamification research integrating game design elements requires continuous refinement based on participant responses.
 

Implement a multi channel feedback strategy that encourages honest and detailed input. Utilize digital surveys immediate post event interviews and anonymous feedback forms to capture diverse perspectives. Event launching tutorials can help you design effective evaluation tools. Pro tip schedule a debrief session where teams can share experiences discuss challenges and provide collective insights. This approach not only generates valuable feedback but also reinforces the collaborative spirit developed during the treasure hunt.
 

With outcomes reviewed and feedback collected youve successfully completed a comprehensive team building experience that offers tangible insights for future organizational growth.
 

Elevate Your Team Building with Expertly Designed Outdoor Treasure Hunts

Organizing an outdoor treasure hunt that truly unites and challenges your team requires careful planning and the right tools. This article highlights key challenges like defining clear objectives, designing engaging puzzles, coordinating teams, and ensuring real-time monitoring for fair play. Many organizers struggle to balance fun with meaningful collaboration while keeping logistics smooth and adaptable.
 

Imagine harnessing a cutting-edge platform that takes care of technology setup, offers dynamic game themes, and adapts to any environment from bustling city streets to wide open countryside. TerraHunt® specializes in exactly these solutions that help companies transform ordinary team events into interactive adventures with seamless multiplayer support. Our platform empowers you to focus on building stronger bonds through games crafted for teamwork, problem solving, and excitement.


Ready to create an unforgettable outdoor treasure hunt tailored to your team’s unique strengths and goals? Discover how TerraHunt® gaming platform can streamline your event from start to finish. Visit TerraHunt.com now to explore flexible game options and bring your team building to the next level. Don’t wait a moment longer to turn your next corporate event into a celebrated success.


Svaneti Trek – Georgian Caucasus

Why travel to Georgia and where to go

I was traveling across the Russian part of Caucasus 15 years ago, and there was an opportunity to visit this area again. This time on the Georgia side.  

There were two interesting (and famous) areas I intended to visit – the Tusheti area and the Svaneti area. Because of the direct flight from Katowice to Kutaisi I chose the Svaneti area.

I wanted to see the famous mountains such as Ushba, Shkhara and perhaps touch a glacier.

How to prepare yourself

Preparation depends on how you want to spent your time in Georgia. If you want to travel across the mountains, sleep in a tent, cook your own food – you should have good travel gear with you.

You should know that in July and August there is extremely hot weather in the Svaneti area. So do not take your feather jacket, or winter sleeping bag because you will be sweaty all the time.

If you have enough cash with you, than you can sleep and eat in the villages with locals and you will need just a small bag with you. There is a lot of cattle everywhere which also means that there is lot of excrement.

Take some water-purification system with you (for example Steripen or Micropur tablets). If you intend to spend most of your time on your feet, you should be prepared for a lot of hill climbing.

Every day is the same – you will start in some village and then you will go up, in the middle of the day you will be on the top and then you will go down to some other village – it hurts sometimes. So train your thighs, ass and knees.

Maps and information about Georgia

  • Paper maps – Most of the treks are quite short and you can do them in one day. Treks are marked quite well, so buy some map. It is not necessary to have a GPS with you (depends on your itinerary). You can get some elementary maps in Touristic center in Mestia (near the park and police office in the city center). Laminated Terra Quest map of Caucasus  (1:75 000) is not bad, you can buy it in some e-shop.
  • GPS maps – Open Street map for Garmin device. I have used two map layers in my Garmin device. I use the ordinary OSM exported layer and the contour lines layer. My device displays both together. You can get great OSM contour maps of georgia on this website: garmin.opentopomap.org
  • Books – Lonely Planet – Georgia, Armenia & Azerbaijan travel guide
  • Websites

What to do after landing at Kutaisi airport

When you get to Kutaisi airport, you can do several things.

  • Exchange money – there is an exchange office with good rates (better rates then in Mestia). The exchange process is very complicated and slow, becouse every person has to fill in a lot of documents. So when you will get out the plane, run to the exchange office immediately…or you might have to wait for the exchange process even two hours. When you get to the arrival hall, you will find the office on the right side. You can use USD as well as EUR. You will get GEL – Georgian Lari.
  • Buy a SIM card – there are 3 cell phone operators in Georgia: Magti (the best one), Geocell (second best) and Beeline (the worst). I am writing about the current situation (2016). Mobile services are extremely cheap in this country and coverage is surprisingly good. When you get to the arrival hall, there are kiosks of cell operators in the middle of the hall. When I got there, there were only the Geocell kiosk and Beeline kiosk (no Magti). So I bought the Geocell data SIM card (5GB for 12 GEL). Internet connection worked almost everywhere during the Svaneti trek except the Iprali area (Magti works there).
  • Get the bus tickets – there is one other important kiosk in the arrival hall – the Georgian Bus kiosk. People there speak English very well, you can buy bus tickets there, or take tickets that you bought in advance and they will tell you all information you want to know. They will help you.
  • Buy the gas cartridge – you can buy gas cartridge at the Georgian Bus kiosk as well. It is better to order it in advance – you should write them what kind of cartridge you prefer (Campingaz, Colleman…)

Transports in Georgia

Every man in Georgia is a taxi driver. Car transport is the best option when traveling. There are some companies that seem to be an official transport agency – for example the Georgian Bus, but I am sure that they are only coordinators and they order and then sell services of individual drivers. This means that sometimes you can get a good car and a good driver, sometimes not.

There are thousands of drivers that want to sell their services to you. When you ask them for a price offer, they want to sell their services as expensive as possible.

Negotiate! Every time negotiate. Young drivers are more aggressive, devious and unpleasant than older ones. Negotiation is easier with the older drivers because they want the job more. Be polite to them.

Cheaper way (than to rent a Jeep) is to share the Van. Most popular 4×4 outdoor Van there is a Mitsubishi Delica (8 people with driver included).

Schedule and GPS coordinates

Day 1 – Kutaisi airport – Mestia

Arrival to Kutaisi airport, exchange of money, buy gas cartridge, buy SIM card, manage transport to Mestia by Georgian Bus (it costs 40 GEL/person. You can get from Kutaisi to Mestia for 25 GEL in a shared Van, but it is more complicated). Transport Kutaisi-Mestia takes around 5 hours.

Buy Geoland treking map of Svaneti 1:50 000 in Mestia (souvenirs shop). Stay in some hostel or put your tent in the Camp (usually someone’s garden). We camped almost behind the town. There is block of flats (right side) and among them the road leads to a house with a big garden, little lake and hammock near the entrance. Prices: 10 GEL/tent/2 person (bathroom included).
 

Day 2 – Mestia – Zhabeshi

Easy trek that I have planned in advance. There is a map of this trek and you can download GPS coordinates here. I’d recommend doing this trek in different way – at the view point (crossroads before Zardlashi village) follow the trail. We tried to follow the alternative path (to the left), but it was not a good idea.

There was a very steep hill and behind the horizon there is a land slide are. The path disappears for about 100m. It is a dangerous part. In the Cholashi village do not cross the river and do not follow the road (right side of the river). Follow the red marks by the river (on the left side) until you get to Zhabeshi.

Day 3 – Zhabeshi – Adishi

Next day you have a lot of elevation gain ahead of you. You have to get almost to the top of a piste (it is the new one, there is several paths to the top, you can lose the right way). Than you turn to the right and follow the nice path to Adishi. Adishi is really not a nice village. You can continue another 500m over the horizon. There is nice place for a tent on the right side of the path (around 100m behind the stream). Map of the trek is here, and you can download GPS coordinates as well.

Day 4 – Adishi – Iprali

We planned to do Adishi – Chkhunderi (the only hill over 3000m)-Khalde trek. At first we had to cross the river that comes from the Adishi Glacier. All travelers around us were speculating where to cross and were trying to find an easier ford in the upper or lower part of the river.

We crossed the river directly, we followed the trail and that is the right way. The flow was quite strong, but the river was not as deep as it seemed to be. Then we went up to the top of the hill to the crossroad (Khalde/Chkhunderi). We made the decision go to the top of Chkhunderi 3036m –  it is actually quite far. When we got to the top, we found the best views till that moment.

There we got a great idea – not to go back to the crossroads and continue down to Khalde, but use a shortcut. In Terra Quest map there are 3 paths that lead from Chkhunderi to Iprali, so we tried to do it. It was a bad idea. The path disappeared in 30 minutes and it was very exhausting to get down to Iprali.

We had to cross several land slide areas, we had to get through a forest, paths nowhere. But finally we got to the Iprali. You can find a map of the planned trek here as well as the GPS coordinates. You’ll find the coordinates of the trek that I recorded lower. There is a good campsite in Iprali – down at the right side of the village. Camp prices: 5 Gel/tent 5 Gel for bathroom.

Day 5 – Iprali – Ushguli

Next day we split up. Our friends followed the red trail and they continued to the Latphari Pass (scheduled GPS coordinates download and map). It’s a long and really hard trek without any streams during the trek.

They told us they had great views up there, but the path was only good till the place before Gorvashi Pass. After that the path disappeared. It is in the Terra Quest map but not in reality. They could continue only because of the GPS in their cell phone (Alpenvereinactive app).

The two of us wanted to follow the less difficult path, but we did not want to use the main road as most trekkers. So I planned an alternative trek on the left side of the road with 600m of elevation gain. It was nothing special – just a path through meadows and forests – but better then the road down there (tens, maybe hundreds of vans were going to Ushguli – UNESCO village).

It was not easy to find the beginning of this trek, you have to go across someone’s yard, but once on the road, you cannot miss the right direction. You can find a map of this alternative trek here. Here are the GPS coordinates of the Iprali-Ushguli trek.

Day 6 – Ushguli – Shkhara glacier – Ushguli

Ushguli is a UNESCO heritage village but definitely the most awful village I have seen (after the Adishi village).  We put our tent down at the Guesthouse Oliver at the top of the hill, right next to the shop. They even promoted their guesthouse at the www.booking.com, but only half of their information is true.

You have to negotiate very carefully (write it down on paper) before you put your tent down, they want your money and when you want to leave, that want more than you negotiated at the beginning – especially if you order some food (you order something and they give you more than you have ordered and you have to pay it later). But it is almost the only place in Ushguli, where the ground is flat. Other camps are on the side of the hill. Prices: 10 GEL/person in tent, 5 GEL for bathroom.
 

We left our gear at the camp and we visited the Shkhara Glacier under the Shkhara mountain (5203m). Easy trek, but be careful with some of the numerous herb fields (Hogweed) on the way to the glacier. Because of short pants I got  a bad skin allergy that affected me till the end of our travel.

There is also a base camp under the Shkhara Glacier, so you can sleep there. Map of Ushguli-Shkhara Glacier trek and GPS coordinates.

Day 7 – Ushguli – Mestia – day off

Next day we went back to the Mestia by van (Ford Transit). We negotiated the price day before, 6 people, 25 GEL/person. We came back to our favorite camp and then we spent rest of the day in the park at the center of Mestia – it was the only place with high trees and shadows. We ate bread (1 GEL), dry fish (5 GEL) and then we went to a restaurant.

Day 8 – Mestia – Chalaadi glacier -Mestia

Next day we visited the Chalaadi Glacier. I enjoyed only the last part of this trek (the forest part).  The first part you have to follow the road and it is quite boring. My skin allergy was worse and worse. Map of the trekGPS coordinates download.

Day 9 – Mestia – Etseri – trek to Mazeri

My skin allergy was frightening this day. We made the decision to split up again. I spent whole day in Mazeri (nice hostel in the middle of village – the only nice house in modern style) and my friends moved to Etseri and they did the Etseri-Mazeri trek. They said that it was beautiful and the trail was well marked. Map of this trekGPS coordinates download.

The biggest problem was to get to these villages – almost all buses leave at 8am, and we got to the bus station at 10am. Nobody wanted to take us to these villages – or they wanted a ridiculous amount of money for it. So I started to negotiate with an older van driver and we made the deal 80 GEL for 4 people (Mestia-Mazeri-Etseri).

Day 10 – Mazeri – Ushba glacier – Mazeri

This day we visited the Ushba Glacier. We left all our stuff in the hotel and followed the marked path. It was not easy. You will have to overcome a big elevation gain to get to the Ushba glacier, but generally – the trek is nice. There are nice views and we enjoyed this. Map of Ushba Glacier trekGPS coordinates download.

Day 11 – Mazeri- Guli pass ( Koruldi Lakes)

Next day we wanted to overcome the Guli Pass (2953m). It was quite a a lot of elevation gain. First part of the trek was clear – there was only one path. The second part leading to the Guli Pass was ambiguous. There were a lot of paths on the hill, but we followed the GPS coordinates on my Garmin device (in opposite direction) and it led us to the pass.

When we got there, we were completely exhausted and when we got about 100m down behind the Guli Pass we split up again. there were a few places for tents and a clear water stream – good place for camping.

Our friend continued to the Koruldi Lakes. We put our tent down and a magnificent thunderstorm came at night. Recorded GPS coordinates of the trek download.

Day 12 – Guli pass ( Koruldi Lakes) – Mestia

Next day, after the thunderstorm (5 hours!!!), we continued to the Koruldi Lakes. The path was on the side of the hill and we had to cross the river in one place. Unfortunately we were not able to do it. This place was extremely dangerous. Some part was covered with snow, but not enough (I am sure that the thunderstorm carried away a lot of it the night before). We tried to get over for at least  1 hour and we used up all possibilities (later we got an information from our friends, that the crossing over was extremely hard even before the thunderstorm, but they were lucky and they did it).

We came back to to the main river of the valley and we followed paths near the river toward the motor-road to Mestia. These paths sometimes got lost, there were a lot of them and some of them led to deserted huts for herdsmen.

This place was covered by 2m high nettles and thistles and the path led exactly through the center of this field of pain. This path was not a very good option. It took us about 4 hours to get down to the motor-road and then at least 1 hour on the road to the center of Mestia. Recorded GPS coordinates of the Guli Pass-Mestia trek.

In Mestia we met our friend who slept at Koruldi Lakes place. This trek was nicer despite the fact that it is not possible to swim in lakes (Koruldi lakes are very dirty and all the cows shit in them).

Day 13 –  Mestia – Kutaisi

Next day we moved to Kutaisi. For transport we used the Georgian Bus company service again. When we used it for the first time after we arrived to Georgia, everything was OK. Good car, older, but a really good driver.

The way back was a horror experience. The driver was very young, he was driving very quickly and the worst thing – he was sleeping the whole time (because he does both ways – Kutaisi-Mestia and Mestia Kutaisi – without any break). We had to force him to take breaks and we had to force him to speak, because he kept closing his eyes the whole time.

When we arrived to the Kutaisi Park, we went to the Hostel center and chose accommodation (about 600 m from the main square (and Kutaisi Park) on Tsereteli Street – there are at least 3 hostels in a  little courtyard – including the Hostel Paradise Road). Prices around 20 GEL/person/night.

Day 14 –  Kutaisi – day off

Next day we visited BazarBagrati Cathedral, and Besik Gabashvili Park (old Ferris wheel and other attractions).

Day 15 –  Kutaisi -Kutaisi airport

We got to the airport about 1 hour before midnight and we spent the night there (airplane was leaving at about 6 am). We got there by taxi, it cost about 30 GEL (4 person). This is where our travel adventures ended.

Tenerife and La Gomera – Sleeping on the top of Pico de Teide

So we went there and enjoyed our Christmas time. There is some information below, so you can follow our steps. You should know that we did not want to swim in the ocean, we wanted to experience great outdoor adventures.

Targets

Pajsaje Lunar, Guajara, Las Canadas, Pico de Teide, Masca, whales or dolphins.

Schedule and GPS coordinates of Tenerife trek


Day 1

Flight to Aeropuerto de Tenerife Sur Reina Sofia. There is a little Touristic center and bus station in front the airport building. It is good to buy a special ticket (12 EUR) that you can use many times and for several people and you will save money every time you take the bus. We traveled to San Isidro and slept in a hotel.

Day 2

Go by bus from San Isidro to El Medano. You can swim in the sea there and you can do one more important thing there – visit the Tenerife Outdoor shop. You can buy a gas cartridge there. They normally have the classic Campingaz cartridges but if you contact the shop several days in advance, they are able to sell you the Coleman kind of cartridge (screw-thread) as well.

Then you will move to Vilaflor by bus (bus station is about 100 m from the shop). There is no direct bus line so you’ll have to change bus in Granadila de Abona. When you arrive to Vilaflor, you can continue on foot. When you arrive to the Pajsaje Lunar/Guajara crossroad, there is possibility to sleep about 100 m from the road towards the south (it is not allowed to sleep in tent in the wild nature, so it is up to you). Make sure you bring enough of water with you as there is no source of water.

Day 3

Next day you will continue to the Guajara mountain and experience magnificent views on Pico de Teide. This part of trek is the most beautiful part. If the weather is good, you can se the entire volcano area and the Pico de Teide. The top of Guajara is the best place for amazing views. There are several paths from the Guajara down to the Canada Blanca, and some of them are more difficult. GPS coordinates do not lead 100% correctly.

There is a tourist center, restaurant, bathroom and shop at Canada Blanca. It’s the only place to buy water (0,5 l for 4 EUR !!!) or alternatively you can take it from a restroom tap. We put our tent down about 200 m before this place right next to the path (shortcut between road and tourist center), but next day we found better places next to Las Canadas circle, about 400 m from the road. It is not allowed to sleep there either, but if you behave quietly and nature-friendly it is normally OK.

Day 4

Next day we did the Las Canadas circle (this trek is amazing, definitely go there in the morning before 9 am – then hundreds of buses and thousands people will come), than we got lunch at Canada Blanca restaurant and got to the Pico de Teide by car (we hitch-hiked). We went up to the volcano by lift (be careful because of opening hours – you have got time till 5 pm, but there are hundreds of people ahead. So be there till 4 pm. When you get up, enjoy the sunset and then move about 200-300 down the volcano. There you will find about three suitable places (on the right side, in the middle of lava field) for a tent in the middle of the path from the top of the volcano to Altavista hut.

You can only get to the top of Pico de Teide without permit in the morning (before 8:30 am) and in the evening (after 6 pm). If you want to go there during the day, you need a permit and you have to ask for it in advance (about 1-2 moths) through internet (permit is free of charge). Sleeping under the top of Pico de Teide is a freezing experience, it was minus 5 degrees inside the tent the day before the Christmas Eve.

Day 5

Next day in the morning you will climb (there is a friendly path – more road then path) to the top of Pico de Teide. From your place it will take about 40 min, so it is not necessary to get up so early. Sunrise was at about 7 am. Then go back to your camping place, pack your tent and follow the path to the El Portilo. There is a tourist center, and a restaurant at this place. There is a bus station in the parking lot, but you should know that there are several parking lots, so you have to find to right one next to the restaurant.

From here, we went to Masca by bus (we had to change the bus 3 times). It is a crazy way, but you can get  from El Portilo to Masca during the rest of day (you will get to Masca late at night (about 11 or 12 pm). We got to Masca late at night and it was Christmas Eve. We slept (almost) under the stars (in the middle of village). There is a beautiful square ant we slept in the bower in front the church.

Day 6

Next day we did the famous Masca trek – Barranco de Masca – the Pirates path. It will take about 5 hours. It is not a difficult trek, but in the end you will be tired enough. Then you will arrive to the ocean and you can take a water taxi (or go back to Masca) to Los Gigantes. We were there around 2 pm and made the decision to visit Santa Cruz de Tenerife and take the day off in a luxury hotel (for rest of the day).

Day 7

Next day in the morning we visited the Anaga area. We went by bus to the Las Mercedes and then to the Cruz del Carmen. There is a tourist center, they will give you maps and they will recommend you the right trek. Unfortunately, the weather was poor that day. The wind was so strong that it was dangerous to walk across the forest (because of falling branches).  We hiked only a short loop there (about 5 km) and then moved back to Santa Cruz de Tenerife. We were trying to figure out what to do next (because we had already seen the best of Tenerife) and we got the idea to visit the La Gomera island.

So we bought tickets at the bus station. Fred Olsen company took us by bus to the Los Cristianos harbor and we experienced a night sail to the La Gomera island to San Sebastian de la Gomera. San Sebastian is amazing city with a great atmosphere. If you want to sleep for cheap, find the Pension Bar Victor (20-30 EUR/room).

Day 8

Next morning we visited the tourist center and got some maps, then we moved to the bus station and went to Pajarito bus stop, where started our one day La Gomera trek. We hiked up to the top of the Alto de Garajonay, the highest La Gomera mountain (to be honest – it is more a hill than a mountain) and then we continued to the Laguna Grande and back again. Easy walk, nothing special, if the weather is good you can see the Pico de Teide from the top of Alto de Garajonay. We got back to Pajarito late at night so we had to take a taxi back to San Sebastian.

Day 9

Next morning we were sailing back to Los Cristianos and we were enjoying views of La Gomera as well as Tenerife from the boat. We had almost half a day left so we bought 2 hour-long whale watching tickets and we saw a lot of them. It was a nice experience. Then we went to the airport (by bus), where we spent a couple of hours for our flight back home.

Transports

We did not use a car. There is a great bus infrastructure, you can get everywhere and at any time. Buy the permanent ticket – it is a good investment.

Equipment

We used standard outdoor equipment, nothing special. You should know, that you will not find drinking water in the nature. You will have to buy it, and it is quite expensive at some places (Canada Bianca).
 

The big battle: GPS vs Smartphone

Tall mountains were perfect, but dense forests suddenly became our least favorite landscapes – the device couldn’t communicate with the satellites and turned into a useless heavy box. Well, at least you could use it for cutting your bread and cheese during a snack break!

These days are almost forgotten because we all have GPS navigation on our smartphones. So how come there are still companies who create – and sell – specialized GPS navigation devices? Are there situations when it would be better not to rely on our smartphone?

Brother from another GPS-mother?

According to the many tests conducted, the accuracy of both smartphones and GPS devices is comparable. It’s not really a surprise, because they process the signals and calculate the location similarly.

However, there might be some important differences between the smartphones themselves depending on the model you purchased. If a GPS device can use both GPS and Glonass signals, it produces slightly more accurate results, but for hiking, it is a negligible difference.

Another functionality that we can compare is offline navigation. If you have downloaded the map or prepared a route with points of interest early, the GPS device works offline all the time.

But phones also don’t really have problems with offline navigation – given it has all the necessary data saved in its memory in advance.

Start cold with a smartphone

One big difference between GPS and phone is in case you switch it on after a long time – the so-called Cold Start. First, the location of the device is determined. Here, the smartphones beat the GPS devices, because they get data from the assistance center of their (or even a foreign) mobile operator.

This service is called A-GPS (Assisted GPS) and can shorten the time of localization of your mobile by tens of seconds. In contrast, classic GPS needs up-to-date satellite information to determine its location. Satellite data has limited validity and must be refreshed every few days.

GPS devices win in a difficult terrain

If you are nice and comfortable in your car, your phone – loaded with offline maps and the desired destination – will help you get there usually without problems.

But you might want to reconsider trusting your little technological best friend in case you venture to some more complex terrain. Research suggests that in that case, it’s better to use a specialized GPS navigation system.

Plus, if your travels lead you to a cold climate, you don’t have to choose between getting lost or freezing your fingers off, as you can control most GPS devices even in gloves, because they have – you wouldn’t believe it – buttons.

Extreme cold temperatures are often deadly for both types of devices, so if you are planning to go to the Arctic or high mountains, it’s a good idea to invest in some GPS that can handle that.

Flat is bad. At least for a battery

As owners of most smartphones know, battery life is always a problem. A modern phone can function about 24 hours, and last time we checked, they are not running on AA batteries or prayers. And even widely used power banks can store only a limited amount of electricity.

On the contrary, a GPS device will last much longer. You can also easily replace the batteries and just move on. Manufacturers say these devices last up to 5 times longer than a smartphone.

After all, their only job is to know where you are and where you should be going. No push Facebook notifications, Viber calls or unsolicited e-mails from Bill.

So, if you want to escape civilization (and Bill) for a while, choose a longer trek and one of the specialized GPS devices.

Understanding What is a Treasure Hunt: An Insightful Guide

Table of Contents

Quick Summary

Takeaway Explanation
Treasure hunts enhance problem-solving skills. They require collaborative strategies, fostering critical thinking through interactive challenges.
Engagement boosts team dynamics. Collaborative tasks break down barriers, leading to improved communication and leadership identification.
Technology enhances treasure hunt experiences. Digital tools expand possibilities, allowing for immersive interactions in various environments.
Clear objectives guide participants. Each hunt relies on a structured progression of challenges leading to a defined ‘treasure’ or goal.
Intrinsic motivation is key for learning. Game-like elements create a fun atmosphere that encourages experimentation and reduces performance anxiety.

Defining a Treasure Hunt: Key Concepts and Principles

A treasure hunt is an engaging interactive activity where participants follow a series of carefully crafted clues, challenges, and hints to locate a hidden “treasure” or complete a specific objective. Unlike traditional games that rely solely on physical prowess or predetermined rules, treasure hunts blend problem solving, exploration, and strategic thinking into an immersive experience.

The Core Mechanics of Treasure Hunts

Treasure hunts operate on a fundamental principle of progressive discovery. Participants receive an initial clue or starting point that leads them through a sequence of intellectual and physical challenges. These challenges are meticulously designed to guide players from one location or task to another, creating a narrative arc that transforms the hunt into an exciting journey.

The mechanics typically involve several key elements:

  • A clear starting point that orients participants
  • A series of interconnected clues that require critical thinking
  • Specific objectives that must be completed to advance
  • A final destination or “treasure” representing the hunt’s culmination

Understanding the Strategic Design

Successful treasure hunts are not random collections of tasks but carefully engineered experiences. Learn more about game development strategies that transform simple scavenger activities into compelling narratives. The design process involves creating logical progressions, balancing difficulty levels, and ensuring that each challenge contributes to an overarching storyline or learning objective.

Professional treasure hunt designers consider multiple factors when constructing their experiences:

  • Participant skill levels and potential prior knowledge
  • Cognitive and physical diversity of challenges
  • Engagement mechanisms that maintain participant motivation
  • Safety considerations and logistical constraints


By integrating intellectual challenges with physical movement and collaborative problem solving, treasure hunts offer a unique form of interactive entertainment that goes far beyond traditional gaming experiences. They transform ordinary spaces into dynamic playgrounds of discovery, encouraging participants to see their environment through a lens of curiosity and possibility.

The Significance of Treasure Hunts in Team Building and Events

Treasure hunts have emerged as a powerful tool in organizational development, transforming traditional team building activities into dynamic, engaging experiences that foster collaboration, communication, and strategic thinking. Explore the full potential of team building games that go beyond conventional workplace interactions.

Enhancing Organizational Dynamics

At their core, treasure hunts serve as more than mere entertainment. They are sophisticated mechanisms for breaking down organizational barriers, encouraging cross-functional interaction, and developing critical interpersonal skills. By creating scenarios that require collective problem solving, these activities simulate real world challenges in a controlled, enjoyable environment.

The strategic benefits of treasure hunts include:

  • Promoting collaborative problem solving
  • Breaking down hierarchical communication barriers
  • Developing nonverbal communication skills
  • Identifying emerging leadership potential
  • Encouraging creative thinking under pressure

Psychological and Performance Impacts

Professional organizations recognize treasure hunts as more than recreational activities. These experiences tap into fundamental psychological principles of motivation, engagement, and group dynamics. By creating a shared challenge that requires diverse skills and perspectives, treasure hunts naturally encourage participants to leverage each other’s strengths and compensate for individual limitations.

Key psychological mechanisms at play include:

  • Intrinsic motivation through game-based learning
  • Reduced workplace stress through playful interaction
  • Enhanced team cohesion through shared achievement
  • Improved trust and psychological safety
  • Development of adaptive problem solving skills

Treasure hunts represent a sophisticated approach to organizational development, transforming traditional team building from passive experiences to active, immersive learning opportunities. They provide a unique platform where professional growth intersects with enjoyment, creating memorable experiences that translate directly into improved workplace performance and team dynamics.

The following table organizes the psychological and performance impacts of treasure hunts in team and organizational contexts, summarizing the unique benefits highlighted in the article.

Impact Area Description
Intrinsic Motivation Engages participants through game-based learning, fostering natural interest and enjoyment
Reduced Stress Playful and interactive environment decreases workplace tension
Enhanced Team Cohesion Shared challenges and achievements strengthen bonds between participants
Improved Trust & Psychological Safety Collaborative experiences build trust and create safe spaces for experimentation
Adaptive Problem Solving Teams learn to respond dynamically to new challenges, enhancing group problem-solving skills

Exploring Different Types of Treasure Hunts and Their Applications

Treasure hunts have evolved far beyond traditional paper-based scavenger activities, emerging as versatile experiences tailored to specific objectives and environments. Discover the multiple advantages of treasure hunt activities that make them adaptable across various contexts and purposes.

Traditional and Physical Treasure Hunt Formats

Classic treasure hunts involve physical exploration and direct interaction with the environment. These formats typically require participants to navigate real-world locations, solve location-based puzzles, and collect physical clues. Physical treasure hunts can be designed for diverse settings including urban landscapes, corporate campuses, natural parks, and indoor facilities.

Key variations of traditional treasure hunts include:

  • Urban exploration hunts in city centers
  • Campus-based team building experiences
  • Historical site discovery challenges
  • Nature trail and wilderness exploration games
  • Museum and cultural institution tours

Digital and Technology-Enhanced Treasure Hunts

With technological advancements, treasure hunts have dramatically transformed. Digital platforms now enable complex, geographically dispersed experiences that transcend physical limitations. These technology-enhanced hunts leverage mobile applications, GPS tracking, augmented reality, and online collaboration tools to create immersive, interactive experiences.


Technology-driven treasure hunt formats encompass:

  • Virtual hunts across global locations
  • Augmented reality puzzle-solving experiences
  • Mobile app-based interactive challenges
  • Remote team collaboration games
  • Hybrid experiences blending physical and digital elements

By integrating innovative technologies and creative design principles, treasure hunts have become sophisticated tools for learning, team development, and entertainment. They offer unprecedented flexibility, allowing organizations and event planners to craft experiences that are not just engaging, but also strategically aligned with specific organizational or educational objectives.
 

To help clarify the main distinctions between traditional and technology-enhanced treasure hunts, the table below compares their key characteristics as described in the article.
 

Format Type Environment Tools Used Advantages
Traditional & Physical Real-world physical locations (urban, campus, museums, parks) Paper clues, physical props, maps Direct interaction with environment, promotes movement, sensory engagement
Digital & Technology-Enhanced Virtual, hybrid, or dispersed (global or remote) Mobile apps, GPS, AR, online platforms Immersive experiences, scalable participation, access anytime/anywhere, technology-driven collaboration

How Treasure Hunts Foster Collaboration and Problem-Solving Skills

Treasure hunts represent a powerful experiential learning methodology that transforms abstract problem solving concepts into tangible, engaging experiences. Explore innovative learning approaches for high school students that demonstrate the educational potential of interactive challenges.

Cognitive Skill Development Through Collaborative Challenges

Treasure hunts create complex scenarios that require participants to integrate multiple cognitive skills simultaneously. By designing challenges that cannot be solved through individual efforts alone, these activities compel team members to communicate, strategize, and leverage collective intelligence. The interdependent nature of these challenges forces participants to recognize the unique strengths of each team member and develop adaptive problem solving strategies.
 

Key cognitive skills developed through treasure hunts include:

  • Critical thinking and analytical reasoning
  • Strategic planning and decision making
  • Effective communication and active listening
  • Creative problem solving under time constraints
  • Interpersonal negotiation and conflict resolution

Psychological Mechanisms of Collaborative Learning

According to educational research, treasure hunts tap into fundamental psychological principles of motivation and collaborative learning. Experimental studies demonstrate that interactive challenges stimulate intrinsic motivation by creating an environment where learning becomes an enjoyable, shared experience. The game-like structure reduces performance anxiety and creates psychological safety, enabling participants to take intellectual risks and experiment with different problem solving approaches.
 

Psychological benefits of collaborative treasure hunt experiences encompass:

  • Enhanced team psychological safety
  • Reduced hierarchical barriers
  • Increased intrinsic motivation
  • Development of growth mindset principles
  • Improved emotional intelligence

By integrating sophisticated cognitive challenges with engaging gameplay mechanics, treasure hunts provide a unique platform for developing complex interpersonal and problem solving skills. They transform traditional learning experiences into dynamic, interactive environments where personal growth and team development occur organically and enjoyably.

Take Your Team to the Next Level with TerraHunt® Interactive Experiences

Have you ever noticed how traditional team building activities often struggle to keep everyone truly engaged or deliver lasting results? The article highlighted how a modern treasure hunt blends immersive challenges, strategic thinking, and collaboration—all key drivers for organizational growth. Many companies today face the challenge of making team events meaningful, accessible, and memorable for everyone, whether onsite or remote. With TerraHunt® you can transform abstract concepts from the article such as progressive discovery and collaborative problem solving into lived experiences for your team.

Our unique platform offers outdoor treasure hunts, virtual escape games, and flexible hybrid solutions that work anywhere your people are. Dive into unforgettable activities that foster trust, break down silos, and deliver measurable results. Discover how our technology-driven approach sets a new standard in interactive team engagement on the TerraHunt platform.
 

Are you ready to upgrade your events and achieve stronger team results? Explore example games and solution options at TerraHunt.com. Now is the right time to create shared experiences that inspire, unite, and unlock your team’s full potential.

Start planning your next-level adventure today.

GPS trackers will keep an eye on your precious things (and people)

What to look for in a GPS tracker?

When choosing your new tracker, you should think about what you will be using it for. If there is a possibility of it getting wet, it’s a good idea to invest in something waterproof or at least water resistant. Make sure to check also the battery type, life and how it is charged. Some of them can work for several months, others will need to be charged every few days. And let’s face it, taking care of a needy GPS charger is not fun and is limiting its use.

Another characteristic that might be important for you is the accuracy of the tracking. If your goal to know where your car is, you probably need a lower accuracy than if you want to know where exactly your grandma is.

Next-level GPS spying

For some uses it is a good idea to invest in a locator with a very high accuracy and a smartphone app. Some of them can even alert you if the tracker gets in a space it shouldn’t – like your dog in your bedroom. The app will also be able to show you history, statistics and more.

You can also choose a maximum distance of the tracked person from you or something else for example your house. If they exceed it, could can receive a notification. It’s good if you want to keep your kids and property safe. It should be also possible to set and alert in the opposite way, for when someone or something is getting closer. Maybe it’s time to get your obnoxious ex a new fancy watch?

Protect your GPS tracker

It’s great to use the GPS tracker, it can be dangerous to have the settings changed without your knowledge. That’s why most of the apps allow you to secure it with a password.

There are many brands you can choose from in different price ranges. For outdoor you can use GSP spot from Global star or Garmin reach. The mobile providers are also in the game – you can protect your car with O2 Car Control or GPS Locator from T-Mobile.

Main advantages of GPS locators

  • Easy to use
  • Control over smartphone
  • Almost unlimited reach
  • Many different functions
  • Keep your property and loved ones safe
  • See it on the map

GPS trackers for cars

You can use GPS locators to precisely track the location of your vehicle, its journey and even the speed it was going. They are usually used by companies to control their employees, but their popularity with private car owners is growing as well. You can even pair your GPS tracker with the logbook and save yourself some time. If you want one of these, look for one with long battery life.

Animal tracking

We used to have great tracking skills in the wild, now we have GPS tracking. If you have a dog that like to go on hikes by himself, your cat is a part-time escape artist or you want to keep an eye on a herd of cows wandering around a huge property, this might be for you. Most of these trackers look like a pendant for a collar and usually come with an app that will notify you when your animal will venture outside of the permitted zone – be it your house or your mountain valley.

GPS trackers for kids

If you are worried about the safety of your kids, you can get them a fancy smart watch with a SIM card that will allow you to track their location. The watch will alert you in case the kids takes it off or the battery is dying. Most of the available watches also have SOS call option. If you press this, they will automatically send the information about the last known location to pre-defined numbers and start to record sound. If you want to use it for your teenager above 15 years old, you’ll need their consent. Good luck with that!

Where is my wallet?

How many times did you wonder where your keys or wallet are? With the GPS trackers you won’t have to do that anymore. Just attach it to whatever you want to track! Some of these devices are super small, others can be used also as a power bank or a flashlight.

GPS for outdoor activities

Tracker for outdoor activities are very sturdy and usually waterproof. Their job is to quickly and precisely show your location. You can use it to track your run, hike or send the data to someone if you need to be rescued.

The fascinating history of computer games: from Snake to GPS games

When the games moved to our mobile phones, the graphics quality increased and better hardware allowed even better experience, this type of entertainment has become a true part of the entertainment industry. Let’s take a look at its history.

History of computer games

The first ever computer games came to life almost at the same time as computers themselves, in the 1930s to 1940s. Humans love to play.

As with many technological inventions, their real use is sometimes very different from what the engineers had in mind when they created it. For example, the open Unix operating system, essential in the development of the Internet, was originally designed for game development.

Since the 1940s, gaming has gone through many ups and downs. This is mainly because games are subject to the same forces of the market as any other product – they become popular for a while and are soon overshadowed by the next big thing. In 1983, the computer gaming market saw a significant drop in sales, as console-based games arrived.

As computer technology evolved and 3D graphics arrived, games became more appealing again. The improvements in processing speed and other important characteristics meant that game designers could also make their games more difficult and sophisticated.

The market is still developing and attracting a growing number of quality developers and investors. We can’t forget about the players, whose interest or disappointment with a specific game can mean a huge success or a fatal failure of a whole game design studio.

The gaming industry is constantly evolving

Since the 1970s, the gaming industry has undergone major changes. The first arcade game Computer Space, came in 1971, followed by a very successful video game Atari Inc, Pong. In 1977, the market stagnated, but came back again in 1978 with another quality game called Space Invaders.

Arcade machines began to appear in public spaces, such as shopping malls, shops, restaurants. Playing a game on your personal computer, something unimaginable just a decade earlier, started to gain momentum, too.

In the 1980s, the gaming industry was forever changed by the arrival of the Nintendo system, Gameboy and others.

The 1990s brought many important advances, including the use of CDs to store and distribute software. 3D graphics became the standard for video game visuals. Internet was evolving rapidly and made multiplayer gaming possible.

The billion-dollar industry

The gaming industry generated considerable revenue – in 1994 an estimated $ 7 billion from arcades and $ 6 billion from home consoles in the US alone.

In the new millennium, games continued to evolve with the technology and the desires of players. Mobile games became the new golden child of the gaming industry, and a new gaming platform has emerged in the form of social networks.

In the future, the growth and popularity of augmented reality mobile games might turn our phones into next-generation gaming consoles!